DIY Text Painting
Here is a detailed how-to for the text painting I made last week for the guest half bathroom. I used parchment paper to transfer my text and desired font onto my canvas, which is a neat little trick!

How to Make DIY Text Art:
I taped off the first color blocked section. I painted it a pale blue/turquoise, using a large paintbrush and acrylic paint.
 |
| Don’t mind the dim lighting in my “studio” a.k.a. messiest basement ever. |
I waited three hours for the paint to dry, then taped off another section and painted it. I waited for three hours and finally painted the final cream block of color. For all three colors I used a dry paintbrush and brushed away from the tape to help avoid bleeding. Then I had a color blocked painting:

While I waited for the paint to dry (as tempting as it was to watch), I worked on the letters. I printed out the letters I wanted on my computer, using a large font, and taped them together with spacing that looked “right”.

How to Use Parchment Paper as Art Transfer Paper:
I laid parchment paper over the word and carefully traced the perimeter of the letters. You can also purchase artist’s tracing paper, but parchment paper was convenient and I found it worked just as well. And thanks to Costco, I have oodles of it.


Then I flipped the parchment paper over and followed the outline of the tracing I had done. I placed paper under the parchment paper because the graphite transferred.

I flipped the parchment again and followed traced the letters with my pencil again. The tracing I did on the back side deposited graphite on the canvas. Neat trick, right?
 |
| Yup, that is a Dora the Explorer pencil. |

I filled in the lines using a very small, angled paintbrush. I prefer this method because it created a hand drawn look (but much neater than my hands could do unassisted) and not a stenciled look. But this project would work with letter stencils too.
 |
| Half-way done. More paint needed to make the letters opaque. |

Here is my color inspiration: an ad I filed away just because the color combo was so inspiring.
 |
| My inspiration. |
 |
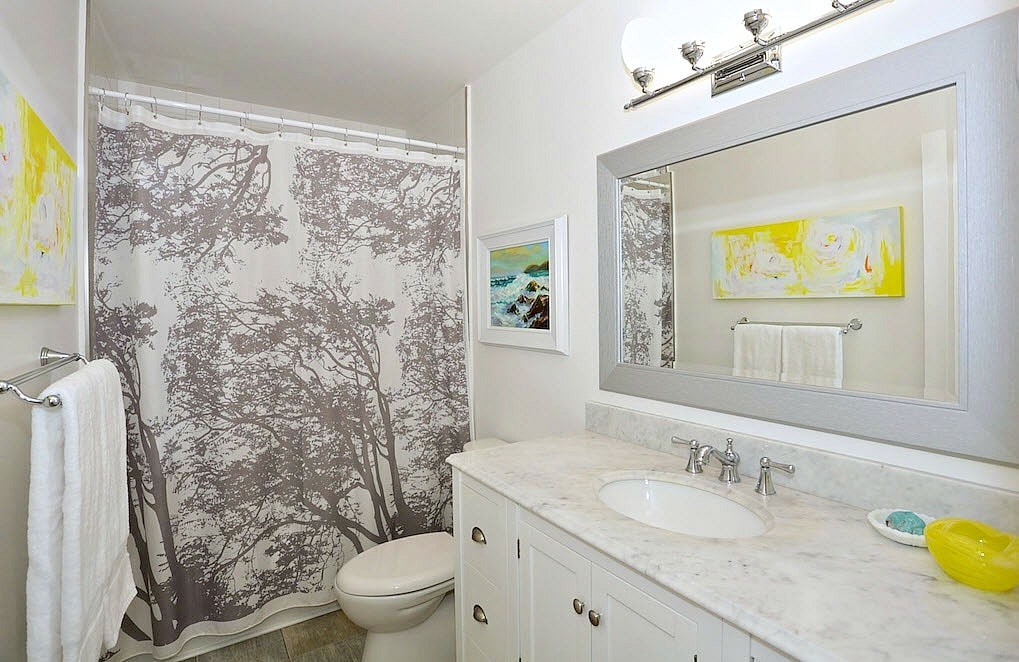
| Word. |


This is such an amazing idea 🙂 Thank you for sharing.I love the way it looks in the bathroom 🙂
Oh Tanya…this is just so gorgoeus..you clever cookie! Good Skills lovely..it turned our perfect! x
I love it. It's cute. And kinda funny :p
What a great idea! It looks perfect in your bathroom.
Art and type are always a good combo! Nice!
Very clever and creative. I love the scale of the painting in the bathroom. It fills up the space wonderfully!
This is so amazing! Love the tongue in cheek word – not sure of that is what you meant! Fabulous!
WORD!!!!Thanks for the tip on painting away from the tape to avoid bleeding. Will def do that!
That looks great Tanya! Just the inspiration I needed to get started on some DIY around here.
You are so creative… Another beautiful work…
Inspiring! Really neat. Makes me want to put my own spin on it.
Very Very cute! i love the color combo! Thanks for sharing!
Love this. found you at Kelly's and so glad I did. 🙂
I found you at Kelly's and I'm so very much in love with this painting!*sigh*:)Oh, and I've pinned it too!
Yay! I finally know how I'm going to do the EAT in my kitchen – it's been bugging me but the pencil transfer idea is brilliant.