
Townhouse Renovation: Our Before & After Small Budget Small Home Transformation
Hubby and I bought our first home, this townhouse, in 2009. He was only a couple of years into his career and I was starting my PhD. We had a small budget and had toured a lot of really bad townhouses when we finally extended our search into this cute little neighborhood. Sometimes I look at before photos and am proud of how open minded we were! Take a good long look at the before shots and picture us walking around, nodding our heads, and saying to one another, “yes, this is perfect.”
It was honestly the best house we had seen (that we could afford)! It had the best layout, no backyard neighbors, lots of green space in the neighborhood that the condo owned – and a wood burning fireplace! We were so excited to buy our first home and it was a lot of fun turning this little townhouse into a happy and cheerful home on a small budget. We’ve since moved on to a small mid-century meets coastal lakehouse, but we will always love the townhouse. Because we made design decisions always with resale in mind (which turned out to be disappointing, but it’s okay), and because I favor white walls, I think there are a lot of ideas below for rentals and other temporary abodes too.
If you love small space decorating ideas, budget friendly DIY room makeovers, and cute little home decor projects, I hope you’ll enjoy this townhouse tour with before and after room makeovers! Please remember, this was 2009-2013 so some of my design decisions back then might be a little questionable today (cough*chevron*cough).
Exterior Makeover with Strict Condo Rules:
Thanks to strict condo rules, we could only do a small exterior update. We couldn’t even change the front door color! But I did repaint it, and the mailbox, their original colors (shhh even that needed approval which I did not bother with), so at least everything looked fresh and new. I also planted a little bush and some lily of the valley (my favorite flower). The rest of the townhouse before & after makeovers are more impressive, I promise!

Before – “Primary” Bedroom Makeover:
 |
| “Primary” Bedroom – BEFORE |
How to Make a Small Bedroom Feel Airy:
I’ve started the tour with my favorite room! We actually used a secondary bedroom as our primary bedroom because it had the best light (and view) of all three bedrooms (we switched the rooms back when we listed it for sale). Removing the wallpaper border, painting the walls and ceiling a clean white, and installing DIY solid maple hardwood flooring really helped brighten up the room. We took down the torn blind and hung DIY sheer curtains on a simple black curtain rod. We also replaced the dated ceiling fan and installed light wood toned closet fittings to match the new wood flooring. White textured bedding, DIY silk throw pillows, and a shimmering bed skirt complemented the welded headboard my Papa made and DIY colorful triptych art I painted. Thrifted accessories (like an enamel bowl and vintage ceramic pieces) plus a pink Marimekko throw (a serious splurge) added a little more color. The white Robert Abbey lamps, with light-up bases, are something we still have and love, all these years later.


Before – “Secondary” Bedroom + Attached Powder Room Makeover:
 |
| Guestroom and 2-piece Ensuite – BEFORE |
Airy White Bedroom Makeover with Pops of Color & Vintage Furniture:
The proper “main” or “primary” bedroom was used by us as the guest bedroom because its size was perfect to accommodate guests’ suitcases, plus the two-piece ensuite was an added convenience for guests but not something we would have wanted to use ourselves on a daily basis. A vintage chair reupholstered in mint and turquoise fabric, along with a vintage table painted mint, created a nice little corner for guests to relax. Fresh paint, new flooring, and a new ceiling fan were key to updating the room. We also replaced the damaged shutters with handmade curtains (see here and here for tutorials). The beige baseboard heaters were also painted (throughout the whole house, as well).
This room became a catch-all for furniture, including a maple armoire I had a hard time parting with and a vintage teak table that used to be in our living room, but we did purchase a new bed (painted white) and white linens (paired with DIY silk pillows), so this bedroom had a similar look to ours. Paintings by Hubby’s Grandpa really took centre stage with the all-white backdrop. When we didn’t have guests, we used this room for our treadmill and, when guests were over, we hid the treadmill in the closet.


Classic White Powder Room Makeover with Affordable Marble Countertops:
The two-piece bathroom got a complete makeover: DIY vinyl sheet flooring, white vanity and marble top, toilet, mirror, lighting, faucet, towel bar – everything was replaced and installed by us. A DIY text painting was a fun and colorful DIY decor piece.


Before – Home Office Makeover:
 |
| Home Office – BEFORE |
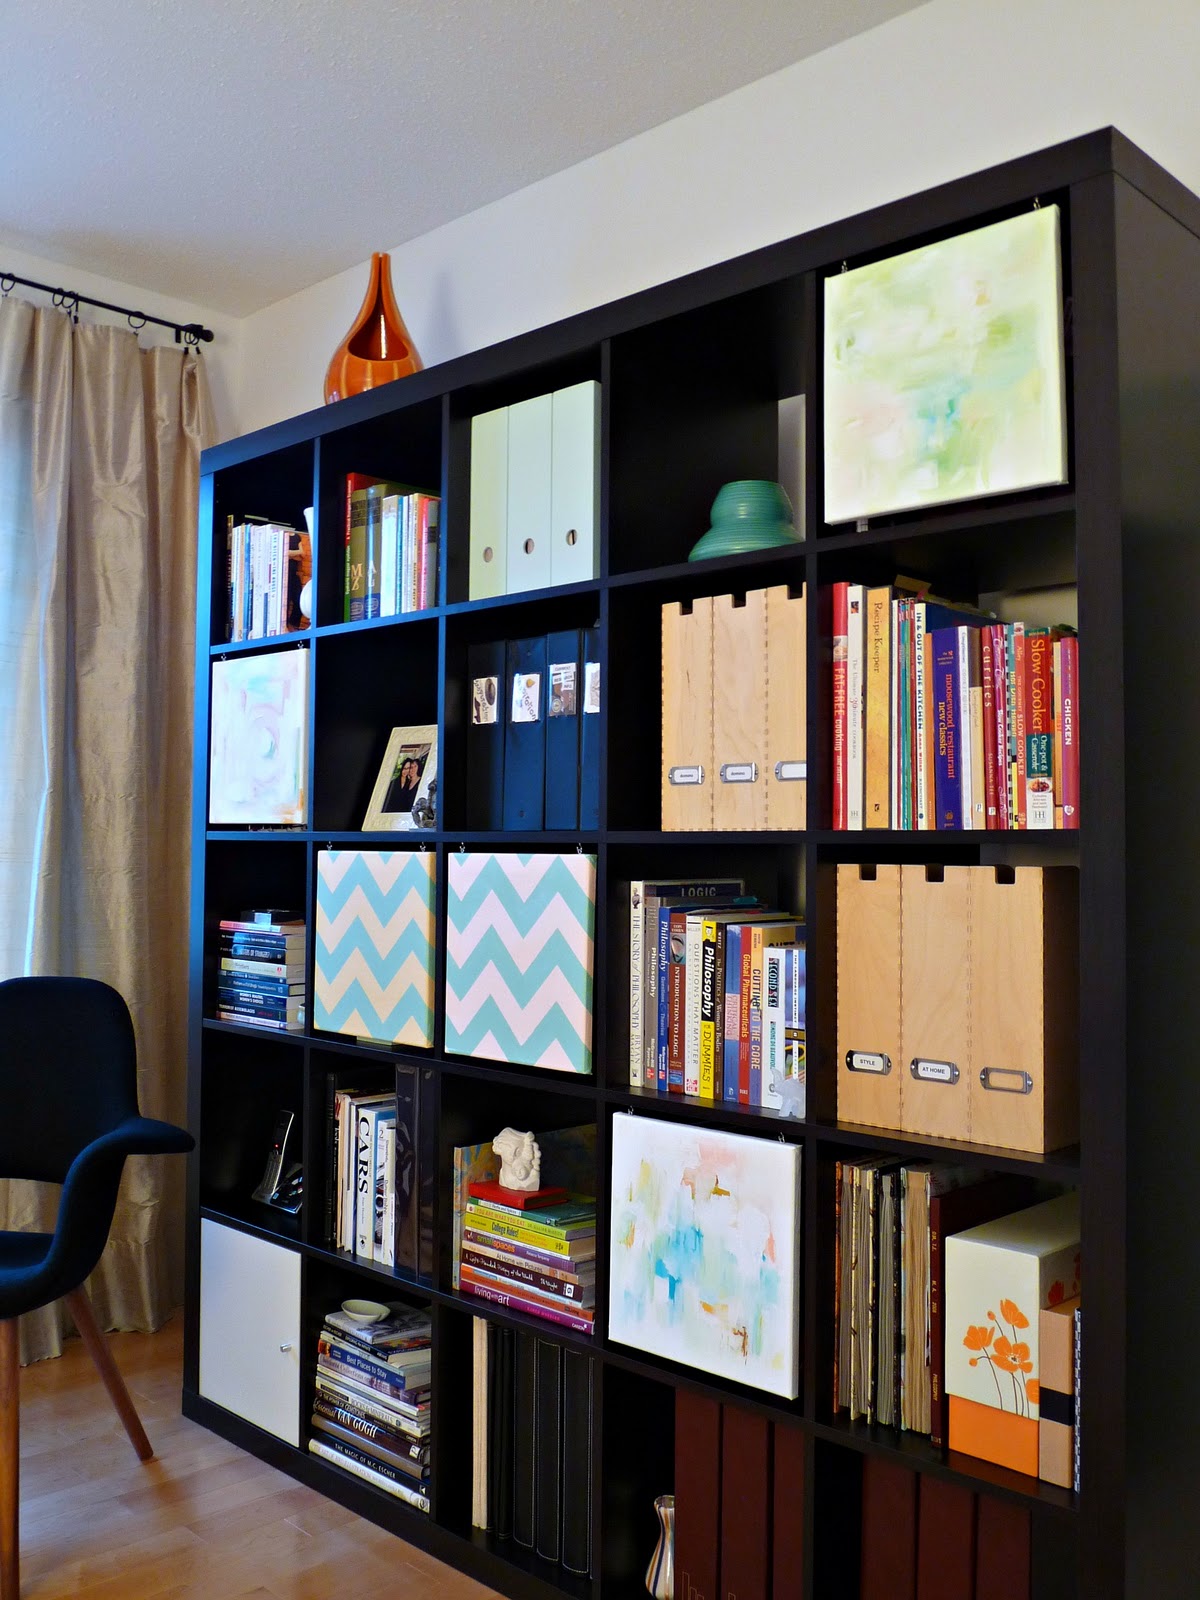
Vintage-Inspired Home Office with DIY Treadle Sewing Machine Desk:
The smallest bedroom became my vintage-inspired home office. We removed the closet doors to make the room feel more spacious, and it became a convenient place for the filing cabinet, DIY magnetic board and silhouette collection. Two DIY desks (my DIY treadle sewing machine desk and Hubby’s DIY welded desk) gave us each a space to work without seeming too office-y. An artful Expedit hack turned DIY canvases into swinging doors to hide unsightly clutter. Silk drapes and art (see here and here for more art info) made the room feel even less like an office. I really splurged on sculptural Robert Abbey lamps (seems to be my weakness) but accessorized with vintage finds plus my childhood rock collection (well, one of them).


Before – Main Bathroom Makeover:
 |
| Main Bathroom – BEFORE |
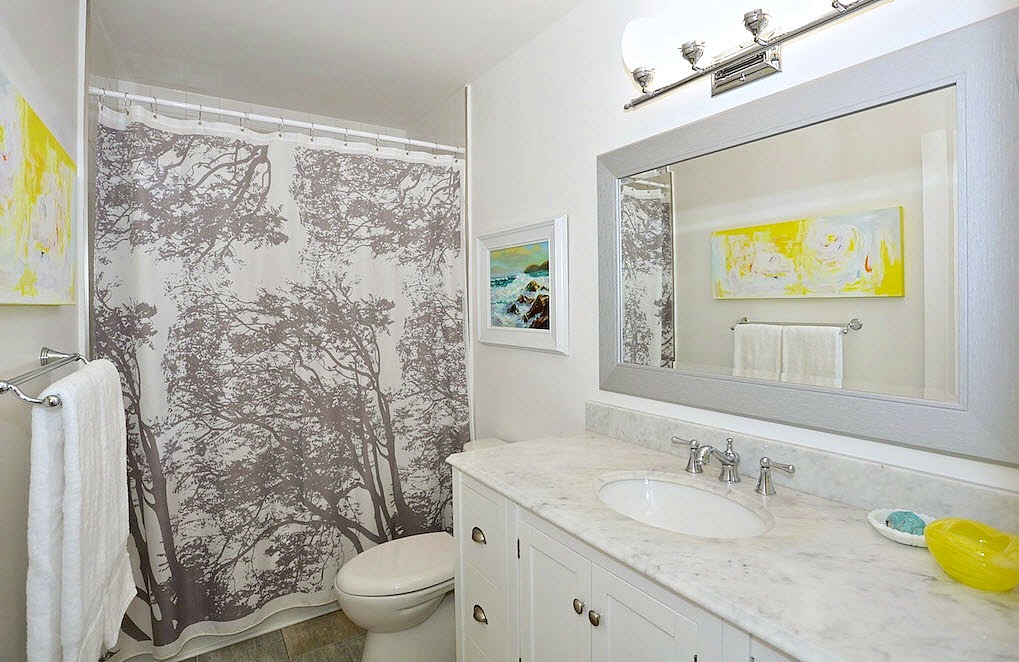
Small Bathroom Renovation on a Budget with Marble Countertops:
Like the guest half bathroom, the main bathroom got a total overhaul. The small bathroom renovation included: a new white vanity, marble counter, affordable DIY flooring, lighting, and art (including a DIY abstract painting and one from the thrift store). The yellow added a much-needed dose of color to this windowless room. The machine-washable Marimekko Tuuli shower curtain wasn’t cheap, but I love any and all Finnish design so it was worth it!


Before – Stairwell Makeover (Carpet to Hardwood):
 |
| Stairwell – BEFORE |
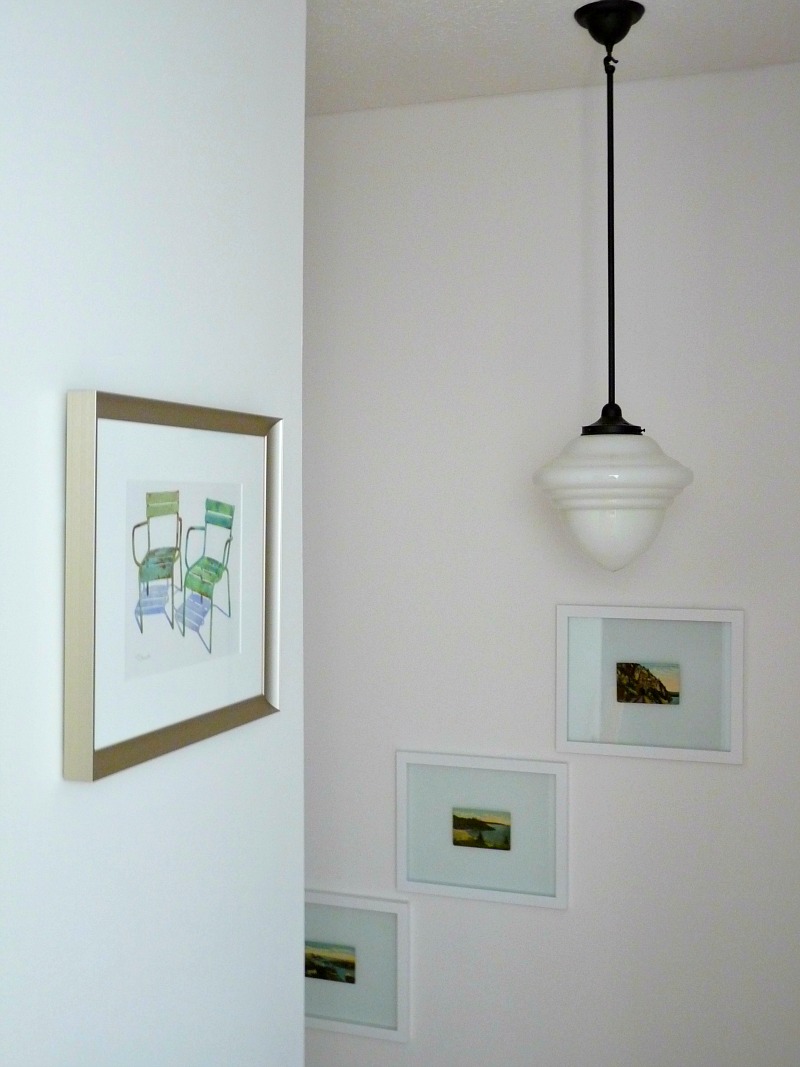
DIY Hardwood Stairs Transformation + Stacked Art Inspiration:
The carpeted stairwell was mostly transformed by painting the walls and ceiling and replacing the carpet with hardwood. But we also did little things, like spray-painting the railing brackets black and replacing the light fixtures. The framed vintage postcards, stacked up the wall, were my favorite addition.

Before – Entryway Makeover:
 |
| Front Hallway & Entryway – BEFORE |
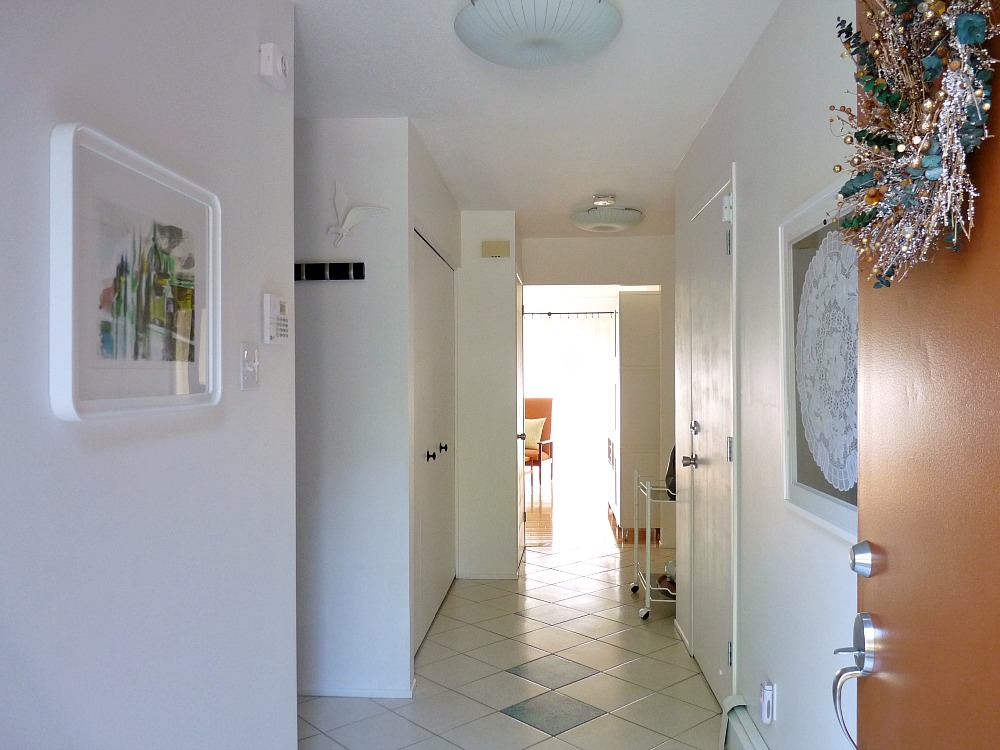
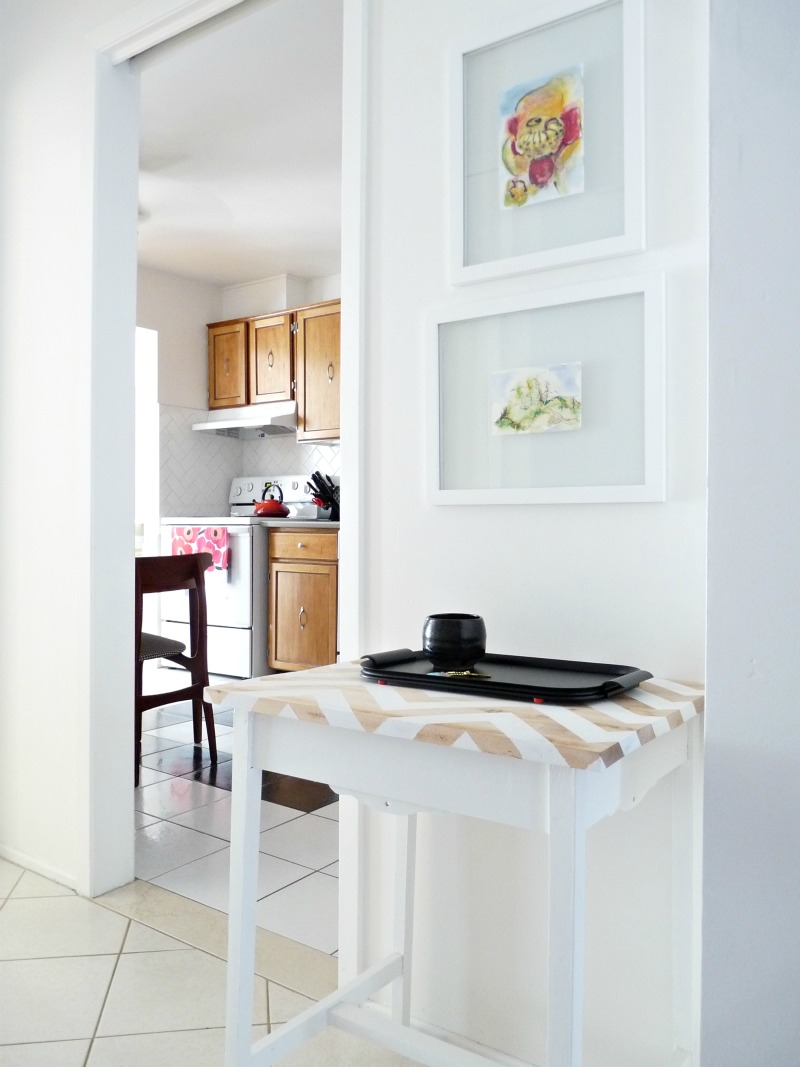
Entryway Makeover Making the Best of Ugly Floor Tile:
The entryway boasted a weird remnant pattern of cream and teal tiles that we couldn’t afford to replace. New light fixtures, door hardware, paint and art (notably my framed embroidery) helped distract from the tile (I hope!). First a little painted useless table, then a painted bar cart, served as a handy place to drop my purse and mail in what was a very tiny space.


Before – Powder Room Makeover:
 |
| Main Floor Half Bath – BEFORE |
Aqua Powder Room Makeover with Glass Vessel Sink:
The main floor powder room originally boasted wallpaper and the same 1970s cabinetry found throughout the house. We stripped the wallpaper and then painted the walls and vanity for a thrifty makeover. We did eventually add a new grey laminate counter, glass vessel sink (because the vanity felt so low), new faucet, light fixture, mirror, and towel rack. We actually started off with beige paint and decided to brighten it up with a pale turquoise paint (see the transformation here). Adding trim to the heating pipe cover made the room look more finished.


Before – Dining Room Makeover:
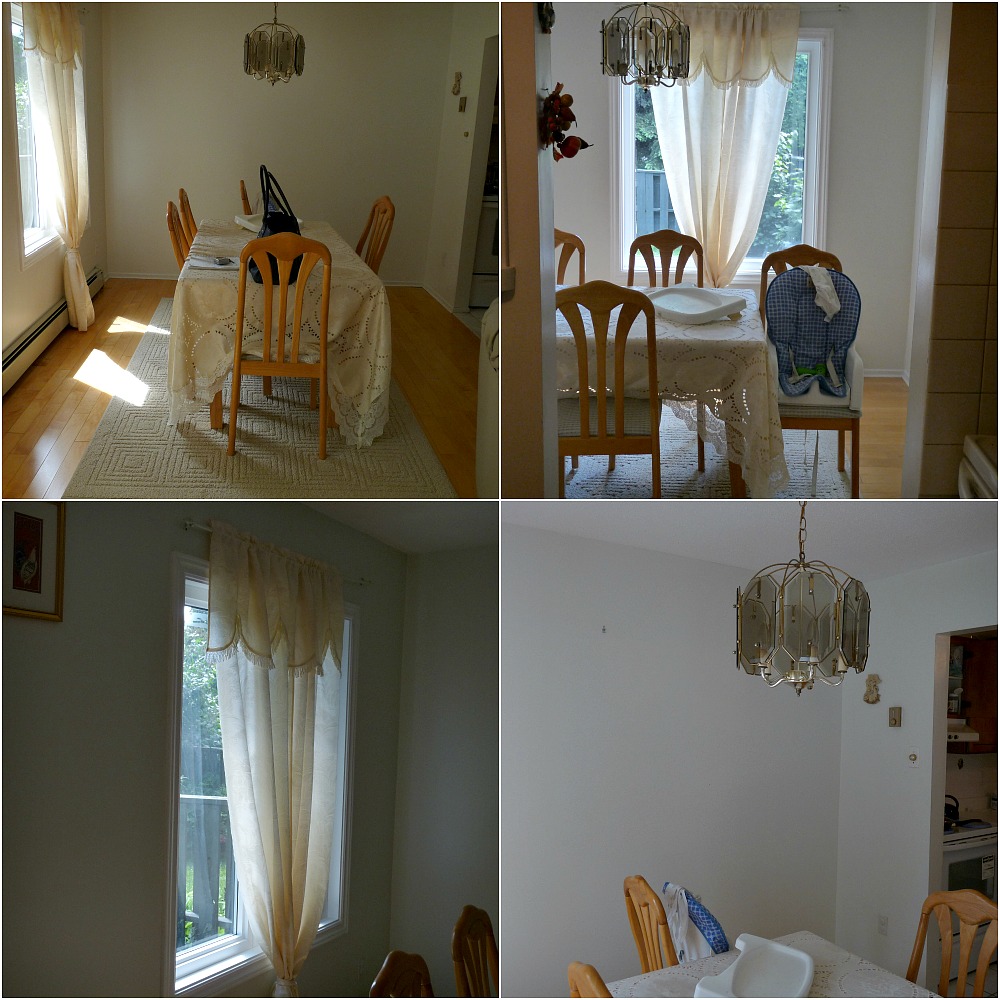 |
| Dining Room – BEFORE |
Mid-Century Inspired Dining Room Makeover with Vintage Teak Furniture:
Luckily, the dining room and living room already had beautiful maple hardwood flooring (we matched the flooring installed upstairs to it). In the dining room, DIY sheer curtains and a simple white drum pendant fixture helped modernize the space while painting the walls a crisp white made the room seem brighter and sunnier. Colorful artwork (including the large painting by Hubby’s Grandpa and DIY agate art) added interest to white walls. A petite vintage teak credenza was perfect for this tiny space.


Before – Living Room Makeover:
 |
| Living Room – BEFORE |
Cozy Small Living Room Ideas & Styling a Natural Brick Fireplace:
I always wanted to paint the brick fireplace in the living room, but Handy Hubby was adamant we keep it au naturel and I honestly grew to love the warmth of the brick. New fireplace doors helped update it and large scale DIY art (a poem stenciled on an antique mirror I saved from the bathroom renos) prevented brick overload. DIY sheer curtains softened the large patio doors but let in a lot of light. A cream leather sofa, scored from the classifieds looked so cute with DIY pillows in a mix of patterns. A vintage print and more artwork by Hubby’s Grandpa personalized the white walls. The vintage teak side tables were a $20 steal at an estate sale, while the Lotte lamps (they match the one in the guest bedroom), were found at an antiques show (without their original shades, sadly) for a fraction of what they usually cost. My DIY billy buttons can be spotted beside the sofa.


Before – Kitchen Makeover:
 |
| Kitchen – BEFORE |
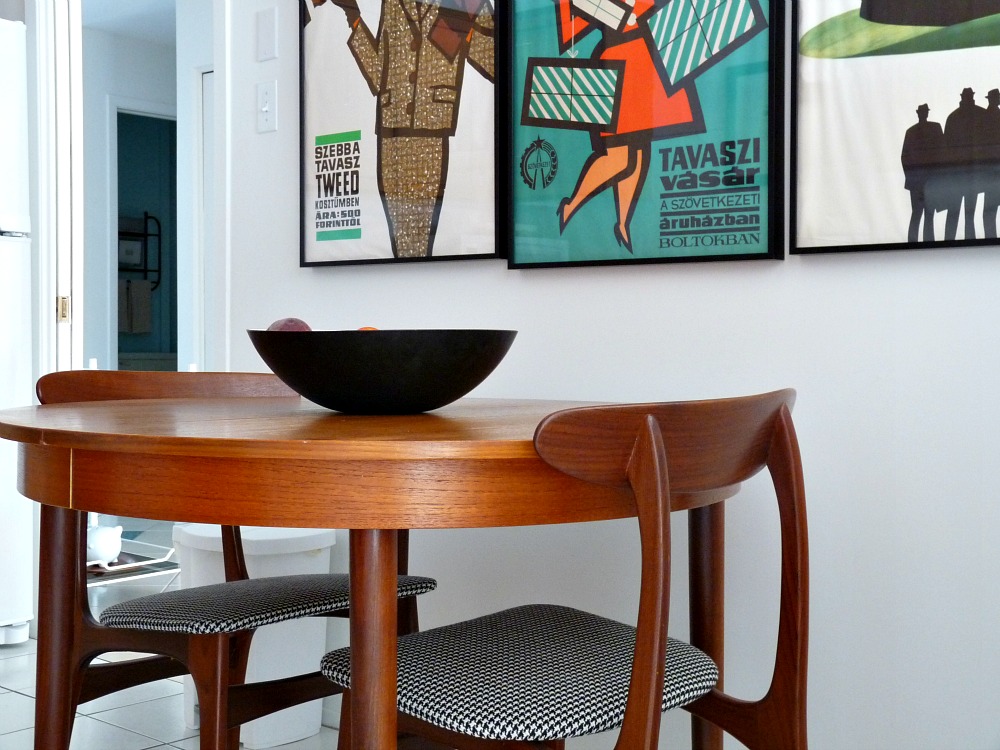
Refreshing Wood Kitchen Cabinets without Paint:
Hubby was also against painting the kitchen cupboards so I stripped and revarnished the cabinets to give them a fresher look. New brushed silver hardware completed the wood cabinet makeover. We also replaced the chipped, off-white laminate counter with an affordable, budget-friendly grey laminate counter that had the look of concrete – I loved that counter. We replaced the square tile backsplash (with weird, awkwardly placed accent tiles) with simple subway tile in a herringbone pattern. We bought a new sink but kept the existing faucet to save money. This budget friendly kitchen makeover also included unexpectedly having to replace the fridge. After deciding to keep the wooden kitchen cabinets, we leaned into a vintage vibe: a vintage teak table and chairs upholstered in black and white houndstooth played up the cozy wood vibes, but were also my way of making peace with the existing black and white floor tile. 1960s Hungarian posters added more color and mid-century style to the otherwise mostly neutral kitchen.


Before – Basement Makeover:
 |
| Basement – BEFORE |
Cozy Budget-Friendly Basement Makeover with Griege Paint:
The basement was painted a dirty white, with two different kinds of peeling wallpaper. The unfinished laundry room was bleak. We removed the wallpaper, disguised flaws with textured paint (I know, I’m sorry), and painted the whole basement (ceiling tiles and all) a warm, unifying griege. The laundry room was framed, dry-walled, and painted as well. For fun, we painted the concrete floors in the laundry room turquoise and added a black and white curtain (made from our old duvet cover) to hide the washer, dryer, pipes, and water tank. The door leading to the basement was turned into a minty message area and the railing was given a $1 makeover.


 |
Before – Garage Makeover:
 |
| Garage – BEFORE |
Small Garage Makeover with Painted Walls & DIY Shelves:
The former homeowners left such a disgusting mess in the garage when they left that even cleaning it (bottom right photo in the collage above) made a huge difference. We bagged and hauled away a truckload of their stuff, including unmentionables. Once it was clean, pale blue paint and a blue wood storage unit we built made the space functional and much less dreary.


That Concludes the Townhouse Tour!
Thanks for stopping by! I hope you enjoyed our little townhouse before and after makeovers. With our small budget, we did the best we could in the time we had to make this little townhouse cute and cozy. We worked with what we had, and while we tried to keep it “neutral” for resale, we did learn a lot about our personal home decor styles and carried those lessons to our next house where we have been a lot more adventurous with our decorating!